DIY Winter Plant Protection: Mini Greenhouse for Balconies
Worried your balcony plants won’t survive the winter? Here’s how to keep them cozy with easy, affordable DIY mini greenhouses that fit even the smallest balcony.
Why Balcony Plants Need Extra Winter Protection
When winter rolls in, your balcony garden faces challenges that in-ground plants simply don't. The combination of container living and an exposed high-rise position turns even a light frost into a serious threat. Understanding these urban microclimate quirks is the first step to keeping your plants safe until spring.
Elevated exposure means faster heat loss. Soil in the ground benefits from the earth's natural insulation, staying warmer much longer than the thin layer of potting mix in a planter. On a balcony, your pots are surrounded by cold air on all sides, so the root zone temperature can drop rapidly once the sun goes down. Without that thermal mass, even hardy plants can suffer.
Wind chill multiplies the damage. Higher floors catch stronger winds, and the wind whipping around a building pulls warmth away from leaves and stems far more aggressively than still air. A wind speed of just 10 mph can make the effective temperature feel 10–15°F colder for your plants. This can cause cell damage in leaves that would otherwise handle the actual air temperature without issue. Placing pots against a wall or adding a windbreak can make a noticeable difference.
Container roots are sitting ducks. Unlike roots digging deep into the ground, container roots are limited to a small volume of soil that freezes much faster. Once the potting medium turns to ice, roots can't take up water, leading to winter desiccation. Terra cotta pots are especially vulnerable because they wick moisture away and can crack when that moisture freezes. Wrapping pots or clustering them together adds a layer of protection where it matters most.
Your USDA hardiness zone is a guide, not a guarantee. Those zone ratings assume a plant is in the ground. On a balcony, you should treat your space as at least one zone colder than your official map. For example, if you're in Zone 7, choose plants rated for Zone 6 or below. Also pay attention to microclimates: a south-facing balcony with a brick wall may stay warmer than a north-facing one. Observing where frost forms first can help you place tender plants in the most sheltered corner.
By recognizing these amplified risks, you’ll be better prepared to choose the right winter protection methods. Even a simple DIY mini greenhouse can bridge the gap between your city balcony and a cozy garden ready for spring.
Quick & Easy Frost Covers for Overnight Protection
When Jack Frost visits without warning, you don’t need a full greenhouse—just a few household items and a little neighborly warmth from your building. These last-minute tricks take minutes and can prevent icy damage until you set up a more permanent shelter.
Drape fabric covers – Keep a stash of lightweight frost cloth, old bed sheets, or even large towels on your balcony. Before temperatures drop, gently cover your most vulnerable plants. Use clothespins to secure the fabric to pots or railings, and remove the covers during the day to let sunlight in. If it’s windy, weigh down the edges with small stones or extra pots.
Create instant plastic cloches – Save large clear plastic bottles or jugs. Cut off the bottom, take off the cap for ventilation, and slip the bottle over a single potted plant. This traps heat from the soil and creates a humid, protected dome. For seedlings, you can use clear plastic cups or even a sandwich baggie propped with sticks.
Lean on radiant heat – Your apartment building is a heat reservoir. Push pots right up against the exterior wall (or even a sunny window) to steal a few extra degrees. The wall radiates stored warmth all night and acts as a windbreak. Bonus: a brick or concrete wall is especially good at this.
Group plants together – You’ve probably seen how huddling makes people warmer; plants work the same way. Cluster your pots into a tight group. Their combined transpiration raises humidity and slows down heat loss. For added insulation, place the whole cluster inside a large cardboard box or wrap the outermost pots with burlap. Just ensure air can circulate so fungal issues don’t creep in.
These quick covers buy you a night or two of protection, but for sustained cold, you’ll want the DIY mini greenhouse we’ll build next. Start by gathering your materials—chances are you already have them around the house.
Step-by-Step: Build a PVC Mini Greenhouse for Under $30
A sturdy mini greenhouse is a game‑changer for balcony gardeners facing frosty nights. This PVC frame design costs less than $30, requires no special skills, and can be tailored to fit your exact space. Let’s walk through the build
What You’ll Need
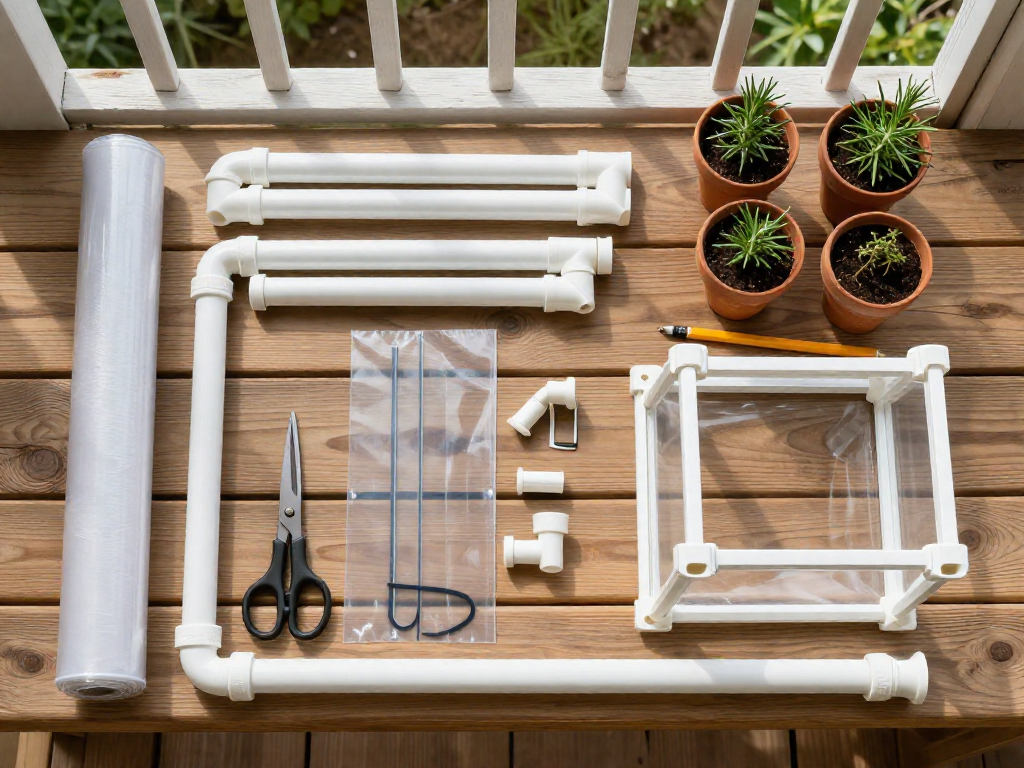
- PVC pipes – ½‑inch diameter works well; total length depends on your dimensions (plan for about 20–30 feet).
- PVC connectors – 3‑way elbow fittings for corners, plus T‑joints if adding a door or middle support.
- Clear plastic sheeting – 4‑ or 6‑mil polyethylene is durable and lets in light; pick a drop cloth or roll at least as large as your frame’s surface area.
- Heavy‑duty zip ties – 8‑inch ties make attaching the plastic easy.
- Weather stripping – adhesive‑backed foam tape to seal edges.
- Optional: PVC cutter or hacksaw, measuring tape, marker, scissors.
All these supplies are available at hardware stores or online. Total cost stays well under $30 if you shop sales and use leftover pipe from previous projects.
Step 1: Measure and Plan Your Balcony Spot
Choose a sheltered area against a wall or railing to cut wind exposure. Measure the width, depth, and height you need—most balcony plants and shelves stand between 3 and 5 feet tall. Sketch a simple box shape: you’ll build two rectangular sides, a back, and a roof. Leave enough room to walk by and to open the door flap.
Step 2: Cut PVC Pipes to Length
Using your measurements, mark and cut the pipes. For safety, wear eye protection if using a saw. A PVC ratchet cutter makes clean, easy cuts. Label each piece (e.g., “left side top,” “right front vertical”) to avoid confusion during assembly. Dry‑fit everything before committing.
Step 3: Assemble the Frame with Push‑Fit Connections
Start by building the two side frames. Connect cut pipes to 3‑way elbow fittings at each corner, pressing firmly until snug—no glue needed, which keeps the greenhouse adjustable and storable. Connect the sides with horizontal pipes across the front, back, and roof. Add vertical supports in the middle of long spans if you experience sagging. The structure should feel rigid yet still capable of being disassembled with a firm tug.
Step 4: Attach the Plastic Sheeting
Drape the plastic over the frame, leaving a few extra inches on all sides for overlap. Begin at the roof and work downward, pulling the plastic taut but not so tight it bows the pipes. Fasten the sheeting to the frame every 6–8 inches with zip ties. Trim excess plastic, leaving a two‑inch margin to tuck under or trim later. Make sure all corners are covered, and double‑up ties at stress points.
Step 5: Create a Ventilation Flap
On the front side, cut a large upside‑down U‑shape to form a door flap. Reinforce the cut edges with duct tape to prevent tearing. Attach a small stick or spare pipe piece along the bottom of the flap as a weight to keep it closed. Loop a zip tie (loosely) at the top corners to hold the flap when it’s rolled up for venting on sunny days.
Step 6: Block Drafts with Weather Stripping
Press adhesive foam weather stripping along the edges where the plastic meets the balcony floor, wall, or railing. This seals out cold drafts and keeps warmth inside. Pay special attention to the bottom perimeter—cold air sneaks in from below.
Final Touches and Safety Tips
If your balcony is windy, anchor the greenhouse by tucking the bottom edges under heavy planters or tying the frame to the railing with bungee cords. Place a thermometer inside so you can monitor the microclimate. On sunny winter days, open the flap to prevent overheating. When spring arrives, simply pop apart the frame and roll up the plastic for compact storage.
This PVC greenhouse gives your plants a cozy winter home for the price of a few takeout dinners. Build it in an afternoon, and watch your balcony garden thrive even when temperatures drop.
Cold Frame from Recycled Materials: A Budget-Friendly Alternative
If you love the idea of a mini greenhouse but want something even more rustic and cost-effective, a cold frame built from recycled materials is a perfect weekend project. This simple structure acts like a sun-powered blanket, trapping heat during the day and releasing it slowly at night, keeping your greens cozy without a single watt of electricity.
Start by sourcing an old window sash, glass door, or even a large picture frame with glass intact. Check salvage yards, secondhand stores, or neighborhood swap groups—you'd be amazed at what people toss. Make sure the glass is clean and crack-free, and handle it with care. If you can't find one large piece, two smaller ones can work side by side.
For the base, you can build a simple wooden box from untreated lumber or pallet wood. Aim for a height that accommodates your tallest plants, typically 12–18 inches at the back and 8–12 inches at the front, so the lid slopes southward. If carpentry isn't your thing, just stack bricks, cinder blocks, or even sturdy straw bales in a U-shape—no nails required. Secure the window on top with hinges or by simply resting it and attaching a prop stick for ventilation.
Position the cold frame on your balcony floor where it gets the most direct winter sun—south-facing is ideal. Angle the lid to catch those low rays, and you'll see internal temps rise noticeably on clear days. To boost insulation, line the bottom with a thick layer of straw, shredded leaves, or mulch. This creates a warm, breathable bed for tender herbs, lettuce, or seedlings.
One key to success is ventilation. Even in cold weather, sun can quickly turn your cold frame into an oven. Prop open the lid a few inches during warmer afternoons to avoid cooking your plants. A simple stick or adjustable arm does the job. On overcast days you can keep it shut to hold in every bit of warmth. With a little daily attention, your DIY cold frame will extend your growing season by weeks—and prove that great gardens don't require a big budget or balcony.
FAQ
Can I leave my balcony plants outside without protection in winter?
It depends on your USDA hardiness zone and the plant’s cold tolerance, but most balcony plants need protection from freezing temperatures, wind, and snow. Without a mini greenhouse or cold frame, tender perennials and tropicals are likely to suffer or die. Simple covers like cloches or moving pots to a sheltered corner can help, but a dedicated mini greenhouse offers the best insulation.
How do I choose the right size mini greenhouse for my balcony?
Measure your available floor and vertical space, then consider how many plants you want to overwinter and their mature heights. Leave enough room to open doors or vents and to walk around safely. Slim, tiered greenhouses work well for narrow balconies, while wider models suit those with more square footage.
What is the best material for insulating plant pots?
Bubble wrap is a popular and effective insulator because it traps air and is easy to wrap around pots. Burlap, old blankets, or foam sheets also work, but avoid materials that retain moisture directly against the pot. For an extra layer, place wrapped pots inside a larger container filled with straw or mulch.
How often should I ventilate my DIY greenhouse?
Ventilate whenever the outside temperature rises above freezing and the sun is out, typically opening vents or doors for a few hours in the late morning or early afternoon. This prevents overheating, reduces humidity, and discourages fungal diseases. On mild winter days, you might need to ventilate daily, but always close up before temperatures drop again at dusk.
Can I start seeds in a balcony cold frame during winter?
Yes, you can start seeds of cold-tolerant vegetables and flowers like spinach, kale, or pansies in a cold frame during late winter, but you’ll need to monitor soil temperature and light levels. The cold frame acts as a mini greenhouse, warming the soil enough for germination while protecting seedlings from frost. In very cold climates, additional insulation or a seed-heating mat may be necessary.