Spring Seed Starting on a Balcony: Tips and Tricks
Apartment balconies can become the perfect seed-starting spot. Discover how to choose the right seeds, set up a compact growing station, and move seedlings outdoors successfully—even without a greenhouse or yard.
Choosing the Right Seeds for Your Balcony
Starting your balcony garden begins with a simple but powerful choice: the seeds you sow. Not every plant is suited to life in a container or a compact urban space, but selecting the right ones can turn a tiny balcony into a thriving, productive oasis. The secret is to focus on varieties that naturally stay small, adapt well to pots, and reward you with a generous harvest without taking over your outdoor room.
Compact or dwarf vegetable varieties are your best friends. Bred specifically for container gardening, they give you full-sized flavors in tiny packages. Look for names that hint at their petite nature—think 'Patio Choice' yellow cherry tomatoes, 'Tom Thumb' peas, or 'Little Gem' lettuce. These plants won't outgrow your pots or your balcony's railing, and many produce just as prolifically as their full-size counterparts.
Herbs are a natural fit for balcony gardens. Basil, chives, cilantro, parsley, and mint (always keep mint in its own pot—it spreads enthusiastically) all thrive in the confines of a container. They don't demand deep soil, they forgive occasional neglect, and you can harvest them leaf by leaf all season long. Nothing beats stepping out your door to snip fresh basil for a caprese salad.
If you're new to gardening, leafy greens and quick-rooting vegetables are wonderfully encouraging. Spinach, lettuce, and arugula grow fast and tolerate partial shade, making them perfect for balconies that don't get all-day sun. Radishes are another brilliant choice: they mature in as little as 25 days and need only a small pot. Seeing those bright roots pop up is a confidence booster for any beginner.
On the flip side, steer clear of plants that love to sprawl unless you have exceptionally large containers and sturdy vertical supports. Indeterminate tomatoes, pumpkins, winter squash, and watermelons are space hogs that can quickly overwhelm a small balcony. If your heart is set on tomatoes, stick with determinate (bush) types, which stay manageable. Pole beans are okay if you provide a tall trellis, but bush beans are simpler.
The sunlight your balcony receives is a make-or-break detail. Most fruiting and flowering plants crave at least six hours of direct sun each day. If you have a sunny south-facing spot, go ahead and plant sun-lovers like tomatoes, peppers, basil, and marigolds. For balconies with less light—say, four hours or dappled sun—embrace shade-tolerant heroes: leafy greens (lettuce, spinach, kale), chives, parsley, cilantro, and mint will all grow happily. Flower options like impatiens and begonias can add color without needing direct rays.
Choosing the right seeds is the foundation of a successful balcony garden. By matching your plants to your space and light, you set yourself up for a season of small-space abundance. And once you have your seed packets in hand, the real fun begins—getting your hands dirty and watching life unfold right outside your door.
Essential Equipment for Balcony Seed Starting
Getting seeds off to a strong start on a balcony is all about recreating the cozy, controlled conditions of a greenhouse—within the limits of your outdoor space. The right supplies make this easy, even in a small footprint, and many are compact enough to tuck onto a shelf or table. Here’s what you’ll want to gather before you sow.
Start with containers that balance drainage with space efficiency. Standard cell trays are tidy and stackable, but don’t overlook peat pots, soil blocks, or upcycled yogurt cups. Just punch a few holes in the bottom of any household container—drainage is non-negotiable to prevent damping off. If floor space is tight, a sturdy tiered plant stand lets you maximize vertical real estate while keeping seedlings at a comfortable working height.
Fill those containers with a dedicated seed-starting mix, not garden soil or heavy potting mix. Look for blends that are light, sterile, and moisture-retentive—often composed of peat or coconut coir with perlite or vermiculite. This fine texture allows tiny roots to spread and helps retain just enough water without becoming soggy. Avoid mixes with large bark chunks or added fertilizer; seedlings don’t need strong nutrients until they have true leaves.
Light is often the trickiest variable on a balcony. If yours faces north or is shaded by buildings, natural sunlight may not be enough for stocky, healthy growth. A compact LED or fluorescent grow light can sit just inches above the trays, and many models clip onto shelving or hang from hooks. Aim for 14–16 hours of light per day, positioning the bulbs close to prevent leggy stems. Even on a brighter balcony, early spring days can be short, so having a backup light ensures your seedlings never stretch.
Warmth is the secret to fast, even germination. A seedling heat mat placed under your trays maintains the soil between 65–75°F, which is ideal for most vegetables and flowers. Mats are slim, waterproof, and use very little electricity—perfect for tucking onto a balcony shelf. Once seeds sprout, you can remove the mat to avoid overheating. If buying a mat isn’t in the cards, the top of the fridge or a warm indoor spot can work for pre-sprouting before moving trays outside.
Seeds need consistent humidity to break their dormancy. Covering trays with clear humidity domes or a sheet of plastic wrap traps moisture and warmth. Just remove the cover once seedlings emerge to let air circulate and prevent mold. If you’re using upcycled containers, a clear salad clamshell can double as a mini greenhouse.
Finally, treat your delicate seedlings to gentle waterings. A small watering can with a fine rose attachment disperses water in a soft shower that won’t dislodge seeds or batter tiny stems. A spray bottle works well for the first few waterings when the soil surface is barely covered. Water from below whenever possible by setting trays in a shallow pan of water and letting the mix wick moisture upward—this protects fragile leaves and encourages deep rooting.
With these basics, your balcony becomes a miniature nursery ready to churn out vigorous seedlings. The beauty is that everything can be neatly stored when not in use, so your outdoor oasis remains a place of beauty, not a cluttered workspace.
Step-by-Step Seed Starting Process
Now for the fun part: getting your hands dirty and sowing those seeds! With your equipment ready and seeds chosen, the process becomes a simple, repeatable routine. Here's how to go from mix to sprouts with confidence.
Pre-moisten your seed-starting mix
Dry seed-starting mix is dusty and repels water, making it hard to evenly hydrate later. Before filling your trays, pour some mix into a bucket or bowl and slowly add water, mixing with your hands until it feels like a damp sponge—moist enough to hold shape when squeezed but not dripping. This ensures your seeds get consistent moisture from the very start.
Fill trays and sow at the right depth
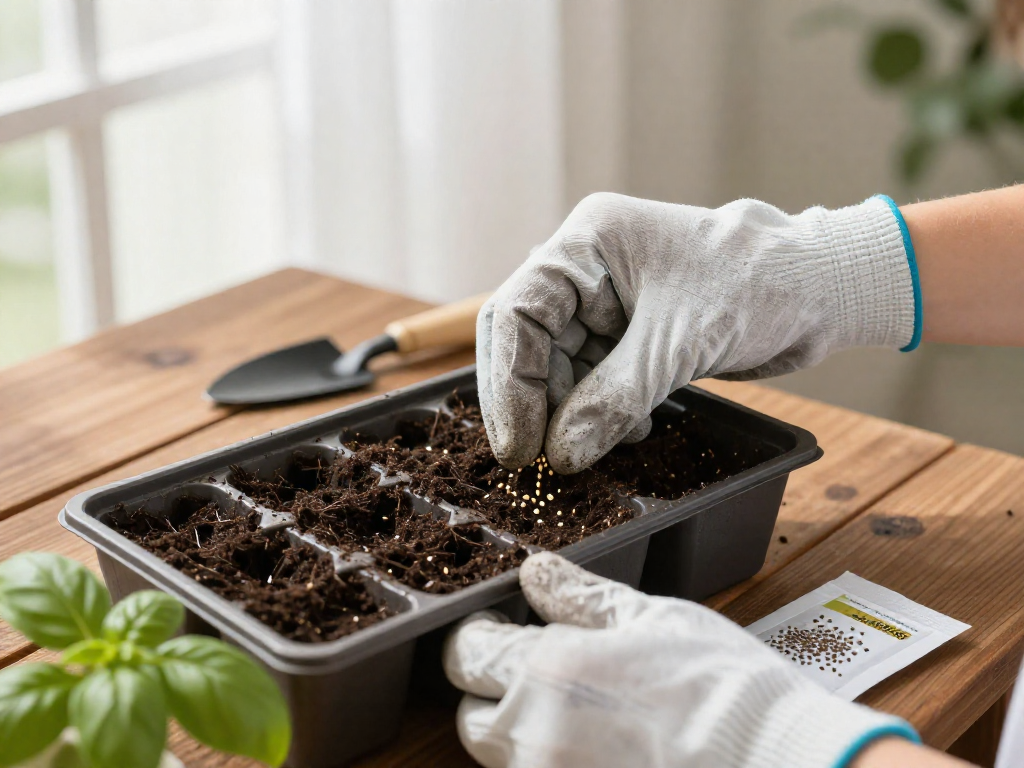
Fill each cell of your seed tray with the moistened mix, gently tapping the tray on a solid surface to settle it without compacting. Avoid pressing down too hard—seeds need light, fluffy soil to push through. Check each seed packet for its recommended planting depth. A rule of thumb: sow seeds twice as deep as their diameter, but tiny seeds like lettuce or basil often prefer a light covering or even surface sowing. Use a pencil or dibber to make a small indentation, drop in one or two seeds per cell, and lightly cover with mix. Mist the surface with a spray bottle to settle everything in place.
Label everything immediately
It's astonishing how quickly you forget which tray holds what. Grab plant labels or popsicle sticks and write the variety and date you sowed. Stick them in the tray before you move on. This small habit prevents mix-ups and helps you track germination times later.
Provide consistent warmth and light
Most balcony-friendly annuals and vegetables germinate best with gentle bottom heat. Place your sown trays on a seedling heat mat, which keeps the soil temperature steady (usually around 70-75°F). At the same time, position grow lights just a couple of inches above the trays. Leave the lights on for 14-16 hours a day, but absolutely give them a nightly rest—turn off lights for 6-8 hours to mimic natural cycles. A simple outlet timer makes this foolproof. Remove the heat mat once most seeds have sprouted to prevent legginess.
Water gently and consistently
The goal is to keep the seed-starting mix consistently moist, like that wrung-out sponge, never soggy. A spray bottle works well for surface moisture, but once seeds germinate, switch to bottom-watering. Pour water into the tray's bottom liner and let the cells absorb it from below for about 20 minutes, then discard any excess. This method avoids dislodging delicate seeds or seedlings and encourages roots to grow downward.
Thin to the strongest seedling
When your seedlings unfurl their first pair of true leaves (the ones that look like mature plant leaves, not the initial seed leaves), it's time to thin. If you sowed multiple seeds per cell, snip the weakest at soil level with small scissors—pulling them out can damage the roots of the keeper. One robust seedling per cell now means a healthier plant later, with less competition for light, water, and nutrients.
Remember, every seed is a tiny experiment. Keep a journal or snap photos on your phone to note what works. Soon you'll have trays of sturdy seedlings ready for the big move to your balcony containers.
Hardening Off: Moving Seedlings from Indoors to Balcony
Your little seedlings have been coddled indoors under gentle lights and steady temperatures. Before they can thrive on the balcony, they need a gradual introduction to the real world—this process is called hardening off. It’s a simple but essential step that prevents transplant shock and sets your plants up for a strong, productive season.
Plan to start about 7 to 10 days before you intend to move seedlings outside permanently. The key is to wait until outdoor temperatures are consistently above 45°F (7°C), even at night—most warm-season crops are sensitive to chilly air. Check your local forecast and pick a stretch of mild weather.
Days 1–3: A Gentle Hello
On the first day, place your seedlings in a sheltered, shady spot on your balcony for just an hour or two. A corner against a wall or under a chair works well. Avoid direct sun and strong wind—these can overwhelm tender leaves. Each day, add an extra hour of outside time. It’s normal for seedlings to look a tiny bit droopy at first; they’re just adjusting to the new air movement and humidity.
Days 4–7: Building Resilience
Now, slowly introduce more sunlight. Start with dappled or morning sun, which is less intense than afternoon rays. A sheer curtain hung temporarily can filter the light beautifully. Gradually increase exposure to direct sun by 30–60 minutes daily. At the same time, let them feel a little more breeze—open balcony sides if possible, but avoid gusty spots. Bring them back inside each night.
Listening to Your Plants
Watch closely for signs of stress: wilting, bleached or reddish leaves, or crispy edges. If you notice these, simply move them back to a shadier, calmer spot and slow down the process. Every seedling is different—some adjust in a few days, others need more patience. The goal isn’t to rush but to build sturdy stems and resilient roots.
The Overnight Transition
After about a week, if no frost is in the forecast, leave your seedlings out overnight. Choose a night that stays mild, and tuck them against the building for extra warmth. If temperatures are predicted to dip unexpectedly, cover them with lightweight row cover, an old sheet, or even cloches made from cut plastic bottles. These temporary protections can save your hard work from a surprise cold snap.
Ready for the Big Move
Once seedlings have spent a full night outside without issue, they’re ready for their permanent containers. Water them well before transplanting, and try to do the final move on an overcast day or in the late afternoon to reduce stress. With careful hardening off, your balcony garden will bounce back faster and start growing almost immediately. You’ve given your plants the best possible transition—now watch them thrive!
Troubleshooting Common Balcony Seed Starting Problems
Even with the best preparation, balcony seed starting can hit a few snags. Here’s how to handle the most common problems without stress.
Leggy Seedlings
If your seedlings are tall, thin, and reaching, they need more light. Move grow lights closer—keeping them 2–3 inches above the tops—or extend the light duration to 14–16 hours. A gentle daily brush with your hand or a soft fan strengthens stems too.
Damping Off
This fungal disease causes seedlings to collapse overnight. Prevent it by ensuring good air circulation with a small fan, watering from below, and using a sterile seed-starting mix. Avoid overwatering and overcrowding.
Pests
Aphids and spider mites can appear even on a balcony. Check leaves regularly. A strong spray of water knocks them off; for persistent issues, use insecticidal soap. Keeping plants healthy reduces susceptibility.
Wind Damage
Balcony gusts can batter young plants. Shield them with a temporary windbreak like a trifold screen or place trays behind a solid railing. You can also cluster pots together for mutual protection.
Temperature Swings
Spring weather is unpredictable. Use a simple thermometer to monitor conditions. If nights dip below 50°F, move seed trays indoors or cover them with a cloche. Gradually acclimate seedlings to outdoor temps during hardening off.
Don't let setbacks discourage you—every gardener faces them. With these fixes, your balcony seedlings will thrive.
FAQ
When should I start seeds on my balcony?
Start seeds based on your local last frost date and the seed packet instructions; for most spring crops, begin indoors 4-6 weeks before that date. On a balcony, wait until daytime temperatures consistently stay above 50°F before moving seedlings outside, typically a few weeks after the last frost.
Do I need grow lights or is natural balcony light enough?
Most balcony settings lack the intense, long-duration light that seedlings need, especially in early spring. Using an inexpensive LED grow light for 12-16 hours a day will prevent weak, stretched growth and produce sturdier plants.
How do I prevent my seedlings from getting leggy?
Leggy seedlings are usually caused by insufficient light or overcrowding. Position grow lights 2-4 inches above the seedlings, thin them to one per cell, and provide gentle air circulation with a small fan to strengthen stems.
Can I start seeds directly in larger pots to avoid transplanting?
Yes, especially for plants that dislike root disturbance like beans, peas, or nasturtiums. Use a light potting mix and keep the soil consistently moist, but be mindful that larger pots dry out more slowly, so avoid overwatering.
What if there's a late frost after I've moved seedlings outside?
If a late frost is forecast, bring containers indoors or into a sheltered area overnight. For larger pots that are hard to move, cover seedlings with frost cloth, old sheets, or cloches, and remove the coverings once temperatures rise above freezing.
How often should I water seeds and seedlings?
Keep the soil consistently moist but not soggy; check daily by touching the surface. For seeds, use a mister or gentle watering can to avoid dislodging them, and as seedlings grow, switch to bottom-watering to encourage deep roots and prevent fungal issues.