Rope-Wrapped Planters from Old Plastic Pails
Transform ugly plastic buckets into chic, textured planters that look store-bought. This zero-cost DIY uses jute or sisal rope to hide unsightly pails, perfect for balconies where every detail counts. Quick to make, weather-friendly, and completely customizable.
Materials You Need
Before you get started, gather these simple supplies. Most are likely already in your home or can be found at a dollar store. You don't need expensive tools or specialty items—just a few basics to transform that old bucket into a stylish planter.
- Clean plastic pail: An empty cat litter bucket, a paint bucket, or any food-grade container works perfectly. Just make sure it's scrubbed clean and has no leftover residues. If the container originally held chemicals, give it an extra thorough wash and let it air out. The size depends on your plant's needs—a one- to five-gallon pail is ideal for most balcony herbs or small flowers.
- Natural rope: Jute, sisal, or cotton rope with a thickness of about ¼ to ½ inch gives that rustic, earthy look and is easy to wrap. You can find these at hardware stores, craft shops, or online. A 100-foot roll usually covers a standard bucket—buy a little extra just in case!
- Adhesive: A waterproof construction adhesive (like Liquid Nails) or a hot glue gun with outdoor-rated glue sticks will keep the rope firmly attached, even through rain and sun. Hot glue sets quickly, making it easier to work section by section; construction adhesive is stronger but takes longer to dry. Both work well.
- Cutting tools: A sturdy pair of scissors or a utility knife for trimming the rope. If using a utility knife, be careful and protect your work surface.
- Optional extras: If your bucket is a bright color, a coat of spray paint (choose one that bonds to plastic) can neutralize it before wrapping. For better glue adhesion, lightly scuff the bucket's surface with sandpaper—it creates a texture for the glue to grip.
Prep the Pail
Before you begin wrapping, take a few minutes to get your plastic pail ready so your finished planter looks polished and holds up beautifully. First, wash the bucket thoroughly with warm, soapy water to remove any residue or labels, and then dry it completely—any lingering moisture can interfere with glue adhesion later. If you’ll be planting directly into the pail, use a drill with a 3/8-inch bit to create three to five drainage holes in the bottom. This step is essential to prevent soggy roots and keep live plants healthy. Next, lightly sand the glossy outer surface with fine-grit sandpaper. This gives the plastic a bit of “tooth” so the adhesive can grip securely, reducing the chance of rope slipping over time. Wipe away any sanding dust with a damp cloth and let dry.
For an extra-refined finish, consider applying a coat of spray paint in a neutral shade like taupe or black before wrapping. This simple trick camouflages any tiny gaps that might peek through between rope strands, making your planter look even more professional. Let the paint fully cure according to the can’s instructions, and then you’re ready to move on to the fun part—wrapping!
Wrapping Technique
Now that your pail is clean and dry, it's time for the transformation. The wrapping technique is all about patience and precision—rush through it and you'll end up with slanted coils or sticky glue smears, but take it step by step and you'll have a planter that looks crisp and professional.
Start at the top rim. Squeeze a thin bead of glue along the rim, then press the very end of the rope into it. Hold it firmly for a few seconds until it sets—this anchor point keeps the entire wrap stable. Don't overdo the glue here; a small line is enough to bond without oozing out.
Now coil the rope around the bucket just below the rim. Keep the rope taut and press each new row snugly against the one above it. Every two to three inches, add another thin line of glue to the bucket surface. Spacing the glue like this prevents it from drying before you can press the rope into it—a common mistake that leads to loose wraps.
As you work, you might notice small gaps forming between coils. Use a flathead screwdriver or a similar tool to gently push the strands flush together. Slide the tip between the rows and nudge them tight; this simple trick makes the difference between a handmade look and a messy one.
For taller buckets, break the job into sections. Wrap four or five inches, then take a short pause to check your progress and let the glue set slightly. This stops the lower adhesive from hardening while you're still wrapping higher up. If you're interrupted, just press down any loose rope before continuing.
When you reach the bottom, wrap right over the edge. Apply a generous but controlled dab of glue to the very last inch of rope, then fold it under the lip and press firmly. Hold it for a moment or two to ensure a strong bond. If your bucket has a slight ridge, tuck the rope into it for a cleaner finish. Once the glue fully cures, your planter will be sturdy and ready for display.
Finishing Touches
Finishing touches are where your planter goes from handmade to handcrafted. First, tackle any fraying. Apply a small dab of clear-drying craft glue or clear nail polish to the end of your rope, pressing it gently into the fibers. Let it dry completely—this seals the rope and keeps your hard work looking tidy.
For a little contrast, try wrapping a thinner decorative twine around the middle or just under the rim. Choose a color that complements your space, like bright white, navy, or natural hemp. Wrap it tightly a few times, then secure the ends with a tiny dot of hot glue or tuck them under.
Want to add handles? Measure two spots opposite each other about an inch below the rim, then drill holes just large enough for your rope. Thread a length of rope through each hole from the outside, tie a knot inside the pail, and trim any excess. Seal those ends too for a clean finish.
For a final beachy or boho touch, glue on a wooden bead or a small shell. Place it where the handle meets the pail or center it on the front. A dot of hot glue holds it securely, and now your planter radiates personality. You’ve turned a simple pail into something truly special—enjoy it!
Styling Your Rope Planter on a Small Balcony
When space is tight, every piece counts. Your new rope-wrapped planter can become the standout feature of your balcony garden with a few thoughtful styling choices.
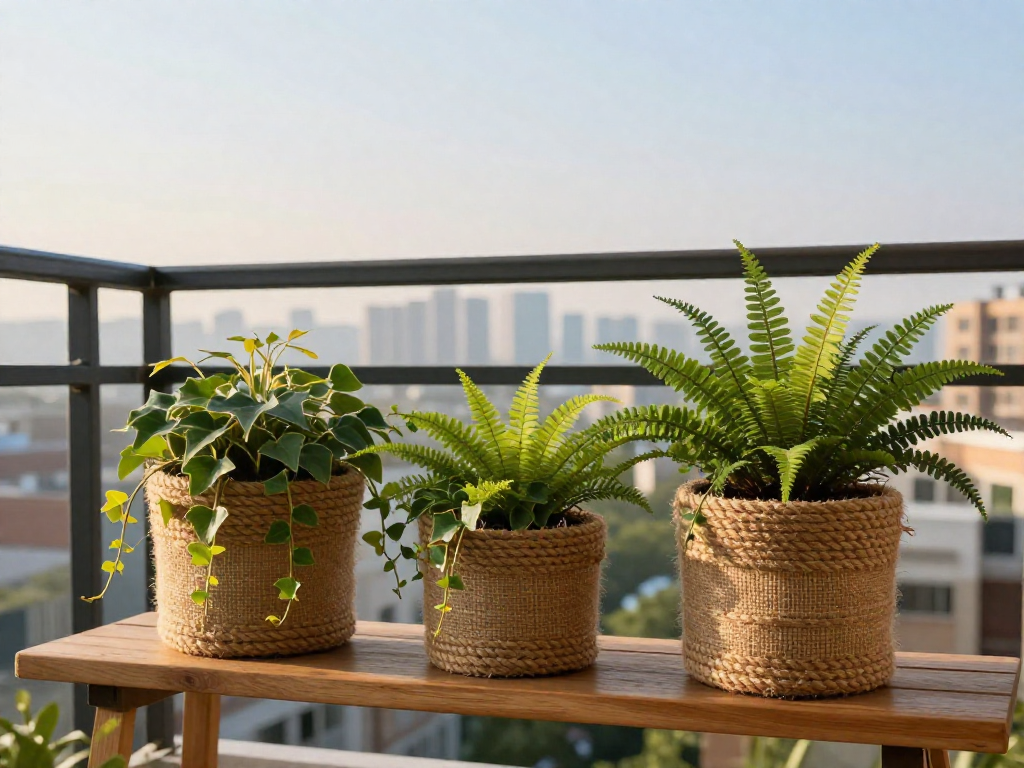
Create an instant vignette by grouping three planters of varying heights. Try a tall, airy grass like bamboo or purple fountain grass in the back, a cascading English ivy or sweet potato vine in the middle, and a low, sculptural succulent like an echeveria in front. This layered arrangement draws the eye upward and makes the most of limited floor space.
For flexibility, treat your rope planter as a cachepot. Simply drop a plastic nursery pot inside, and you can swap out plants with the seasons without disturbing the wrap. This also helps with drainage and keeps the rope dry, prolonging its life.
If floor space is at a premium, get vertical. Attach S-hooks to your balcony railing and hang the planter directly. Choose a sturdy plastic pail with a handle or drill holes for rope hangers. Alternatively, set it on a slim outdoor shelf or a railing-mounted plant stand to keep the floor clear.
Finally, layer in natural textures to create a calm, cohesive look. Pair your rope planter with a bamboo privacy screen, a textured terracotta saucer underneath, or a jute doormat nearby. These small touches tie the space together and make your balcony feel like an extension of your home.
Care and Weatherproofing
Keeping your rope-wrapped planter fresh through the seasons is simple. A stiff brush quickly removes dust and pollen that settles on the balcony. For stubborn spots, a cloth dipped in mild soapy water does the trick—just let it dry completely before handling.
If you chose natural jute rope, treat it to a clear outdoor sealant once a year. This adds a protective layer against rain and humidity, preventing the fibers from breaking down too soon. Apply it in a well-ventilated area, following the product's instructions, and allow at least 24 hours to cure before returning the planter to your balcony.
Winter calls for extra care. When temperatures dip below freezing, bring the planter inside. Water trapped in the rope or pail can freeze and expand, leading to cracks or loosened wraps. An empty spot on a shelf or in a closet works fine until spring.
At the end of the season, empty the pail and store it in a dry corner. Check for any loose ends of rope and re-glue them with a dab of weatherproof adhesive. With this minimal upkeep, your handmade planter stays charming year after year.
FAQ
Can I use this planter outdoors year-round?
Yes, these planters work outdoors year-round if you use weather-resistant rope and adhesive. In cold climates, bring them inside during freezing weather to prevent plastic cracking. Regular maintenance, like checking the rope wrap, will extend their life.
What type of rope is best for outdoor durability?
Synthetic ropes like polypropylene or nylon are best because they resist moisture, mildew, and UV damage. Natural fibers like manila or cotton can deteriorate quickly outdoors. Choose a rope that feels tight and durable, and avoid stretchy or fuzzy materials.
Will the rope rot or attract bugs?
Synthetic rope resists rot and doesn't typically attract bugs. Natural rope may rot if constantly wet and could harbor insects. Keep the planter in a well-ventilated spot and avoid over-watering to prevent moisture buildup.
How do I secure the rope if it starts to unravel?
If the rope ends begin to fray, wrap them tightly with weatherproof tape or a small wire. You can also use clear-drying outdoor glue to seal the ends. To re-adhere a loose section, apply construction adhesive and press firmly until set.
Can I use hot glue instead of construction adhesive?
Hot glue can work for indoor planters but isn't durable outdoors; it may soften in sun or crack in cold. Construction adhesive or exterior-grade glue bonds better and withstands temperature changes and moisture. For a long-lasting planter, stick with adhesive meant for outdoor use.
What plants work best in these planters for a balcony?
Choose compact plants that thrive in containers, like herbs (basil, mint), succulents, or annual flowers (petunias, marigolds). Avoid plants that require deep roots or constant wet soil. Make sure the planter has drainage holes to prevent waterlogging.