Hanging Herb Garden from Recycled Plastic Soda Bottles
Transform empty soda bottles into a space-saving vertical garden that adds fresh flavor to your balcony. This DIY project is budget-friendly, customizable, and perfect for small-space herb growing.
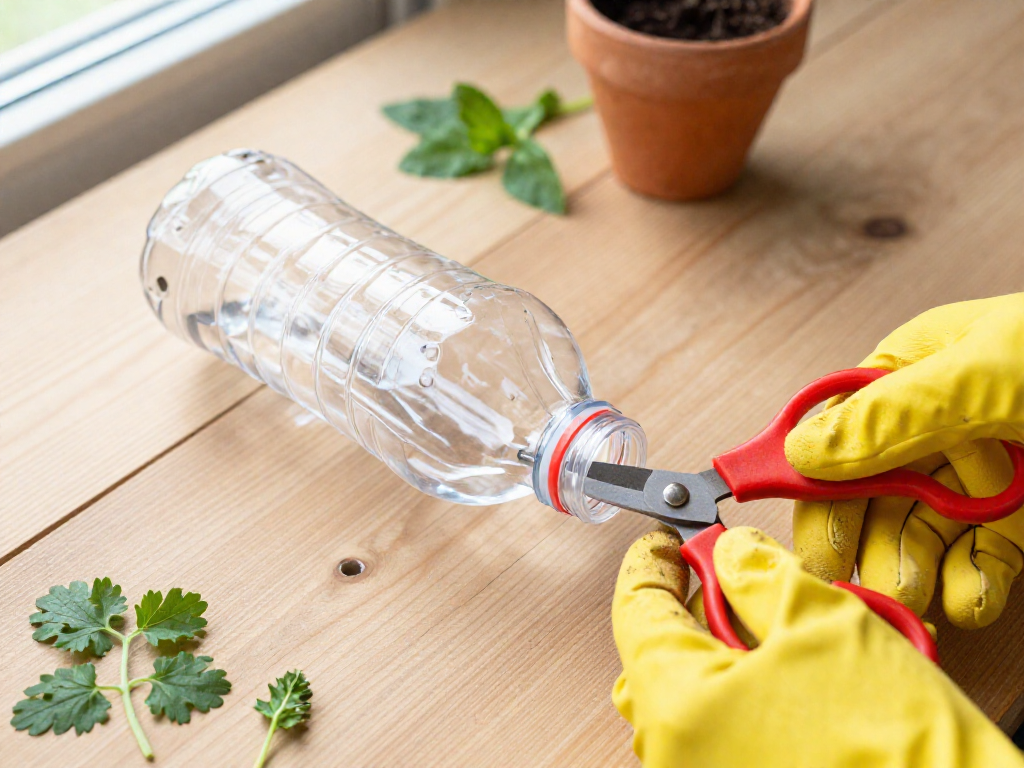
Gather Your Supplies
Before we dive into crafting, let's round up everything you'll need. Most of these items are already in your home or easy to find, making this project both budget-friendly and eco-conscious.
- Clear 2-liter plastic soda bottles – one for each herb you plan to grow. The transparent plastic lets you observe root growth and soil moisture, and the size gives roots plenty of room.
- Utility knife and scissors – the knife helps make the initial cuts, while scissors are great for refining edges safely.
- Spray paint (optional) – a quick coat can turn plain bottles into colorful, UV-protected planters that match your balcony décor. Choose a paint suitable for plastic if you go this route.
- Potting soil and herb seedlings or seeds – a lightweight, well-draining potting mix is ideal for containers. Pick herbs that thrive in your climate, like basil, mint, or chives, and start with young seedlings for a faster harvest.
- String, twine, or S-hooks – for hanging your creations. Twine gives a rustic look, while S-hooks make it easy to move plants around. Ensure whatever you choose can support the weight of a watered bottle.
- Small drill or hot nail – to poke drainage holes. A drill with a small bit works quickly, but a nail heated over a candle (held with pliers!) is a safe, low-tech alternative. Aim for 4–6 holes in the bottom to prevent waterlogging.
Gather everything on a covered surface, and you’ll be ready to start turning trash into a thriving hanging herb garden.
Prepare the Bottles
Now that you've gathered your supplies, it's time to transform those plastic soda bottles into charming herb planters. The first step is a thorough cleaning. Remove any labels and wash the bottles inside and out with warm, soapy water. This gets rid of sticky residue and any lingering bacteria that could harm your herbs. Rinse well and let them dry completely.
With clean, dry bottles, you're ready to create the planting opening. Take a permanent marker and draw a rectangle on one side of the bottle. This will be the cutout where you'll add soil and plants. A size of about 3 by 5 inches works well for a standard 2-liter bottle, but you can adjust based on your bottle size. Just make sure it's large enough for easy planting and care. Remember, this is a forgiving project—don't stress over perfection!
Next, carefully pierce a starter hole within the marked rectangle using the tip of your utility knife. This helps the blade enter without slipping. Then, following your lines, cut along three sides of the rectangle, leaving one long side attached to act as a hinge. That little flap will help hold the soil in place, so don't slice it off! Take your time and cut away from your body for safety.
Now, those freshly cut edges can be sharp, so let's smooth them out. Gently sand all the cut edges with sandpaper or a nail file until they feel smooth and safe. If you don't have sandpaper on hand, you can cover the edges with a strip of duct tape or electrical tape. Run your finger along the cuts to test for any snags—your fingers will thank you, and your herbs will appreciate a safe, snag-free home.
Add Decorative Touches (Optional)
Want your hanging herb garden to reflect your personality or match your balcony’s color scheme? A few decorative touches can turn recycled bottles into charming, eye-catching planters. Customizing is easy, and you probably have most supplies at home.
Start by lightly sanding the outside of each bottle with fine-grit sandpaper. This creates a slightly rough surface that helps paint adhere, reducing the chance of peeling later. Don’t skip this step—glossy plastic repels paint otherwise. Wipe away any dust with a damp cloth and let the bottles dry completely.
When you’re ready to paint, work in a well-ventilated area—outdoors is best, or near an open window with a fan. Use spray paint formulated for plastic for the most durable finish. Apply multiple thin coats rather than one thick layer, holding the can about 8–12 inches away and using sweeping motions. Allow each coat to dry for the time recommended on the can (usually 10–15 minutes) before applying the next. This prevents drips and ensures even coverage.
For a pop of pattern, try stencils or masking tape. Affix your stencil firmly to the bottle, or create stripes, chevrons, or geometric shapes with painter’s tape. Spray lightly over the exposed areas, then carefully remove the stencil or tape while the paint is still slightly tacky for clean lines. Layer multiple colors for a bold look—just let each color dry before applying the next.
After the final coat, let the bottles cure undisturbed for at least 24 hours. Moving them too soon can smudge your design. Once fully dry, your personalized planters are ready to hang and fill with herbs. This step is purely for fun, so feel free to experiment—you can always paint over a design you don’t love.
Create Drainage and Fill with Soil
Before you start planting, let's make sure your herbs will have a healthy home with just the right amount of water. First, create drainage holes in the bottom of each bottle. Using a hot nail or a drill with a small bit, poke three to five holes; this allows excess water to escape and prevents root rot. If you drilled into the side for a hanging planter, just add holes to the bottom of the bottle 'cup.' Next, although not strictly required, a thin layer of pebbles or gravel at the base can improve airflow and keep soil from blocking the holes. Finally, fill the bottle with moist, high-quality potting soil, leaving about an inch of space from the top opening. Lightly press the soil down—no need to compact it. Now you're ready to add your herb seedlings or seeds.
Plant Your Herbs
Now that your bottles are hanging and filled with soil, it's time to bring your herb garden to life. Whether you're starting with seedlings from a local nursery or sowing seeds directly, planting is straightforward and deeply satisfying.
Dig a small well in the center of the soil—just deep enough to comfortably nestle the seedling's root ball. If you're using seeds, check the packet for the right depth and spacing; most herbs only need a light covering of soil. Place the seedling gently into the hole and press the soil around the base to secure it. The goal is to eliminate air pockets without compacting the soil too much.
After planting, water slowly and evenly until you see a few drops escape through the drainage holes. You want the soil evenly moist but never soggy. A spray bottle or a gentle pour from a small watering can helps avoid disturbing the newly settled roots.
For a high-success, low-stress start, choose herbs that love container life and tolerate the unique conditions of a balcony. Our favorites include: - Basil: Thrives in warmth and gives continuous harvests with regular pinching. - Parsley: A biennial that keeps producing if you snip outer stems. - Cilantro: Fast-growing; sow successively for a steady supply. - Mint: Vigorous and refreshing, but keep it in its own bottle—mint can take over. - Chives: Compact, perennial, and their edible flowers are a bonus.
With your herbs tucked in and watered, all they need now is a sunny spot and a little patience. In the next section, we'll cover ongoing care so your hanging garden thrives all season.
Hang Your Garden on the Balcony Railing
Now that your bottles are planted, it’s time to give them a home on your balcony railing. Hanging them securely is key to keeping your herbs safe and your space looking tidy.
Start by choosing a sturdy string or garden twine that can handle the weight of a watered bottle. Cut a piece about 2 feet long. Tie it firmly around the neck of the bottle, just above the cap or the cut opening, leaving enough length to loop over your railing. Double-knot it for extra security. If your railing is thick, you might need to adjust the knot placement or use a longer string.
For a quicker, adjustable option, use S-hooks. Simply slip one end of the S-hook over the top edge of the railing, and hang the bottle’s string loop or a small wire loop attached to the bottle onto the other end. S-hooks are great because you can easily move the planters as the sun shifts or as herbs grow.
Once hung, check that each bottle sits level. An uneven bottle can spill soil or water. Adjust the string length or hook position until it hangs straight. A small bubble level can help if needed.
Spacing is just as important as stability. Herbs need plenty of light, so give each bottle at least 6–8 inches of space. This prevents them from shading each other and ensures good air circulation, which helps keep plants healthy.
Stand back and admire your work! With everything in place, your hanging herb garden is ready to grow.
Care and Maintenance Tips
Once your herb garden is hanging beautifully, a little daily attention keeps it lush and productive. The good news? Herbs are forgiving and will thrive with just a few simple habits.
Watering Wisely – Check the top inch of soil with your finger. If it feels dry, give your bottles a gentle soak until water trickles out the bottom holes. In hot or windy weather, you might water every day; cooler days mean less frequent drinks. Avoid letting roots sit in water, so always ensure your drainage is clear.
Let the Sunshine In – Most herbs need at least six hours of direct sun. Position your bottles on the brightest part of your balcony—south- or west-facing is ideal. If your space is shady, mint, chives, and parsley are more tolerant, though they’ll still appreciate as much light as you can give.
Harvest for Health – Snip sprigs regularly, even if you don’t need them immediately. Frequent harvesting encourages bushy, compact growth and delays flowering. Always cut just above a leaf pair, and never remove more than a third of the plant at once. Use clean scissors or simply pinch with your fingernails.
Pest Patrol – Keep an eye out for tiny invaders like aphids. Spot a few? A strong spray of water from your kitchen sink or hose often dislodges them. For stubborn pests, mix a few drops of mild liquid soap (unscented, without degreasers) into a quart of water, spray affected leaves, and rinse after a few hours. Check weekly so problems stay small.
With these simple steps, your recycled bottle garden will reward you with fresh flavors all season long—right outside your door.
FAQ
What type of plastic bottle is safe for growing herbs?
Food-grade PET plastic bottles with recycling code #1 are the safest choice because they are designed for consumables and don’t leach harmful chemicals. Avoid bottles that previously held non-food liquids, and stay away from plastics labeled #3, #6, or #7, which can release unwanted substances.
Can I paint the entire bottle, or will that harm the plants?
It’s best to paint only the outside of the bottle to prevent any chemicals from leaching into the soil, and use a non-toxic, water-based acrylic or spray paint suitable for plastics. Painting the entire exterior won’t harm the plants, but avoid painting the inside where soil contacts directly, and be mindful that dark colors may absorb more heat in sunny spots.
How often should I water herbs in hanging bottles?
Since bottle planters hold a small amount of soil, they dry out quickly—check them daily and water whenever the top inch of soil feels dry to the touch. In hot or windy weather you may need to water every day, but always make sure your bottles have drainage holes to prevent root rot.
Will the bottles get too hot in direct sun?
Yes, plastic bottles can get quite warm in direct sun, which risks overheating the roots. To minimize this, choose light-colored or clear bottles, or wrap the outside with burlap or light fabric to reflect heat, and consider positioning them where they get morning sun but some afternoon shade.
Can I grow herbs from seeds in these planters?
Absolutely—herbs like basil, cilantro, and dill can be direct-sown into the bottles after adding drainage holes and a light seed-starting mix. Just keep the soil consistently moist until germination, and thin seedlings to avoid overcrowding.