Winterizing Balcony Containers: How to Protect Plants from Frost
Don't let one frosty night undo months of balcony gardening. This guide gives you simple, effective ways to winterize containers so your plants survive and thrive come spring.
Know Your Frost Risk: Hardiness Zones and Plant Toughness
Before you can protect your plants, you need to know what they’re up against. Understanding your local frost risk and how your plants handle the cold is the first step in winterizing your balcony containers. Let’s break it down so you can make a plan that fits your space and your plants.
Find Your Hardiness Zone
The USDA Plant Hardiness Zone map divides the country into zones based on average annual minimum winter temperatures. Your zone tells you which plants are likely to survive the winter outdoors in your area. The easiest way to find your zone is to type your zip code into the USDA’s interactive map (just search “USDA hardiness zone by zip code”). It’s quick and free, and you’ll want to keep that number handy whenever you buy new plants.
Why Containers Change the Game
Here’s a crucial point that’s often overlooked: the hardiness zone rating applies to plants in the ground, where soil insulates roots from rapid temperature swings. In a container, roots are much more exposed. The same plant that’s hardy to zone 5 in your garden might struggle in a pot during a mild frost because the root ball can freeze faster and harder. Even a thick ceramic planter won’t offer the same protection as the earth. So, as a rule of thumb, treat your potted plants as if they’re one or two zones less cold‑tough than the label says. This means you may need to provide extra insulation or move them indoors earlier than you’d expect.
Know Your Plants’ Personalities
Grab a notepad and list what you’re currently growing. Then sort them into two groups: tender plants that will sulk or collapse at the first sign of frost, and hardy favorites that can shrug off a chill. Here’s a practical starting point for common balcony plants:
Tender (damaged by light frost or even cool air): - Basil - Tomatoes - Peppers - Impatiens - Coleus - Most tropical foliage like elephant ear or banana - Many succulents (especially soft‑leaved ones)
Hardy (usually fine down to freezing or below, especially if given a little shelter): - Pansies and violas - Ornamental kale and cabbage - Chives - Rosemary (depending on variety; Arp is quite hardy) - Lavender (English varieties are tougher) - Sedums and sempervivums (stonecrop and hens‑and‑chicks) - Evergreen shrubs like boxwood or dwarf conifers
This isn’t exhaustive, so check the tag or do a quick online search for your specific varieties. The goal is to know which plants can stay out with a bit of protection, and which need to come inside or be treated as annuals.
First Frost and Last Frost: Your Seasonal Bookmarks
- First frost date is the average day in autumn when the temperature first dips to 32°F (0°C), killing tender plants. This is your deadline for moving sensitive pots indoors or giving them a winter coat.
- Last frost date is the average day in spring after which you’re unlikely to see another freeze. That’s your green light for moving plants back outside or starting new seedlings.
You can find your area’s average dates by searching “first frost date [your city]” or checking resources like the Old Farmer’s Almanac. Keep in mind these are historical averages; nature doesn’t always follow the calendar. Watch your local forecast and be ready to act a week or two before the expected date. A sudden early cold snap can catch you off guard.
Put It All Together
With your zone, your container caveat, your plant list, and your frost dates in hand, you can now make smart decisions. Hardy plants might need just a cozy mulch blanket or a windbreak. Tender ones may need to become houseguests for a few months. The next sections will walk you through exactly how to protect each group. But for now, pat yourself on the back—you’ve just taken the most important step: knowing exactly what your balcony garden is facing this winter.
Insulate Pots and Soil to Lock in Warmth
The soil inside a container is more exposed than the ground, so it loses heat quickly once temperatures drop. Insulating the pot and the soil surface is one of the most effective ways to keep roots safe from freezing. You don’t need fancy gear—many of the best materials are already in your home or can be found inexpensively.
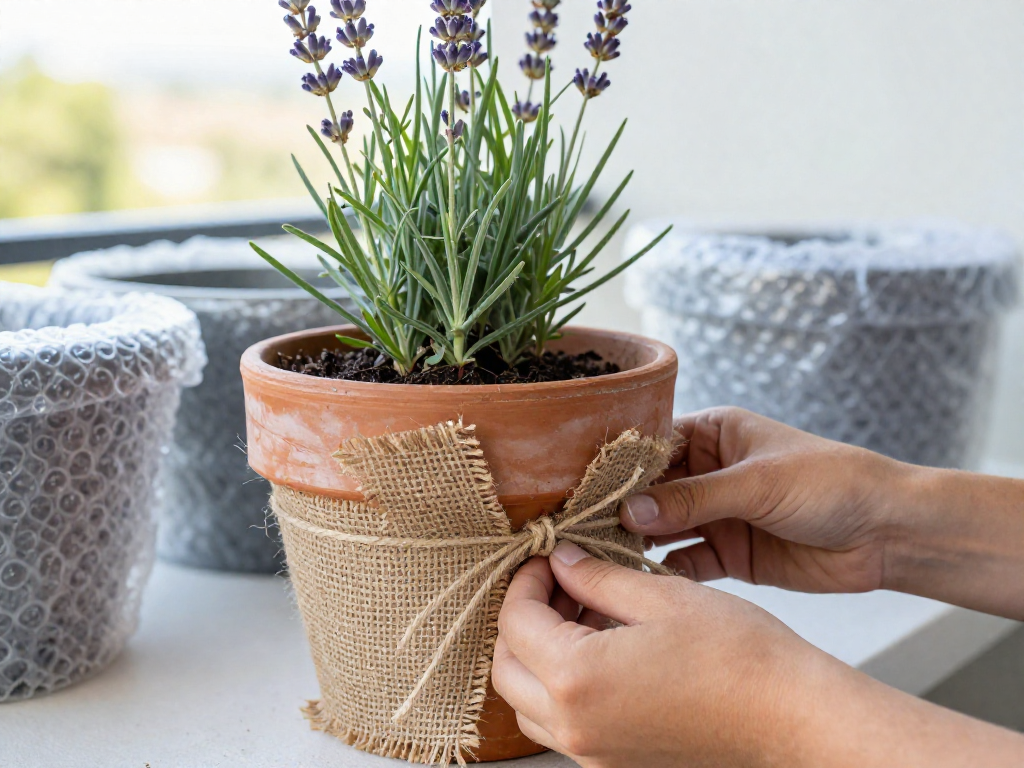
Start by wrapping the pot itself. A layer of burlap, bubble wrap, or even an old blanket acts like a winter coat, trapping warmth around the root zone. Secure the material with twine or zip ties, leaving the top open so you can water if needed. For extra protection, slip the entire container into a slightly larger pot and pack the gap between them with straw, shredded paper, or foam peanuts—this double-potting technique creates a snug, insulated buffer.
Next, raise the pot off the cold balcony floor. Concrete and tile surfaces draw heat away and hold the chill long after the air warms. Place bricks, wooden blocks, or dedicated pot feet under each container to create an air gap. This simple step prevents the soil temperature from dropping as sharply and also encourages drainage during winter rains.
Bunching containers together is another free trick. Group your pots against a wall or in a corner to share heat and block wind, forming a microclimate that stays noticeably warmer. The more mass you have, the slower the temperature inside the cluster will fall. If you can, position the grouping on the side of your balcony that gets the most winter sun.
Finally, top the soil with a generous layer of mulch. A three- to four-inch blanket of straw, shredded leaves, bark chips, or even dried grass clippings acts as insulation for the soil surface, slowing heat loss and protecting delicate surface roots. Water the soil lightly before mulching (unless the plant is dormant and doesn’t need moisture), then refresh the mulch after heavy rains or if it gets compacted. These low-cost, low-effort steps can make a huge difference in whether your plants sail through winter unscathed.
Temporary Covers: Cloches, Frost Blankets, and Mini Greenhouses
When a frosty night is forecast, the simplest way to shield your balcony plants is by covering them. Temporary covers trap radiant heat from the soil and block icy winds, often keeping the temperature around your plants a few crucial degrees warmer. Just be sure to remove them during the day—more on that in a moment.
DIY Cloches from Household Items
You probably already have excellent cloche materials in your recycling bin. A cloche is basically a tiny individual greenhouse that fits over a single pot or plant.
- Plastic bottles: Cut the bottom off a large soda or water bottle and set it over your plant like a dome. The screw cap can be removed for ventilation. For taller plants, a 2-liter bottle works perfectly.
- Glass jars: Clean, clear jars (like Mason jars or large pickle jars) act like miniature bell jars. Place them over small succulents or herbs. They look charming and insulate well, but they can heat up quickly in the sun, so they’re best for overnight-only use.
Frost Blankets and Row Covers
For larger containers or groupings of plants, a frost blanket or floating row cover is lightweight and easy to handle. These fabrics let light and moisture through while trapping heat. You can find them at garden centers or online.
- Drape them directly over your plants, but avoid pressing down on delicate foliage. Use soft ties or clothespins to secure the fabric to the pot rim or a railing without compressing the plant. You can also prop the fabric up with sticks or wire hoops to create a tent, giving your plants room to breathe.
- If you’re using an old sheet or towel, make sure it’s dry and not heavy enough to damage stems. Anchor the corners with weights or clips so wind doesn’t lift it away. Never use plastic sheeting directly on leaves—it can cause more harm than good by trapping condensation and freezing.
Balcony-Friendly Mini Greenhouses and Cold Frames
If you have a bit of floor space or a sturdy railing, a small pop-up greenhouse or a simple cold frame can be a game-changer. These structures act like a tiny outdoor room, shielding multiple containers from frost and wind.
- Pop-up greenhouses: Look for one with a wire frame and clear plastic cover. Most are compact (about 2x3 feet) and fit neatly against a wall. They often have shelves, so you can stack potted plants vertically. Anchor the greenhouse securely to your balcony railing or a heavy piece of furniture; strong gusts can turn them into kites.
- DIY cold frame: Build a simple wood frame with a hinged lid of clear polycarbonate or an old window. Set it over a set of pots or a raised tray. Raising the lid on sunny days lets heat escape and gives plants some fresh air. Even a large clear storage bin turned upside down can work in a pinch—just drill a few holes for ventilation.
The Critical Reminder: Daytime Ventilation
All of these covers work by trapping solar energy, but on a sunny day, even in winter, the temperature inside can soar and literally cook your plants. Always remove cloches, frost blankets, or close greenhouse vents by mid-morning when the sun hits your balcony. It might feel like a chore, but your plants will thank you. Set a phone reminder or make it part of your morning coffee routine: uncover when the sun appears, tuck them back in before dusk if another freeze is coming.
With a few simple supplies and a daily habit, temporary covers can keep your balcony garden thriving through the coldest nights.
Moving Tender Plants Indoors for the Winter
When overnight temperatures start dipping toward 45°F, it’s time to scan your balcony for plants that won’t survive a frost. Tender varieties—tropicals like monstera and bird of paradise, soft herbs (basil, lemon verbena), and many succulents—need to spend winter inside. The move can feel like a big undertaking, but a few simple steps will get them through the cold months until they can bask outdoors again.
Which plants get an indoor pass
Start by sorting your containers. Invite only those that are truly sensitive to cold: coleus, geraniums, begonias, tender ferns, and any herb that’s an annual in your zone. Hardy perennials in pots can often stay out with protection, but a tropical that’s been thriving on your balcony all summer won’t survive a single freeze. If you’re unsure, look up your plant’s cold tolerance; when in doubt, bring it in.
Inspect, prune, and clean before the door opens
Outside bugs become indoor pests quickly. Give each plant a thorough once-over. Check leaf undersides, stems, and soil for aphids, mealybugs, or spider mites. Remove any damaged or yellowing leaves, and prune leggy growth to keep the plant compact. A gentle shower with lukewarm water can dislodge hitchhikers. For extra peace of mind, wipe down pots and saucers with a damp cloth. Let plants drain completely on the balcony before carrying them across your doorstep.
Ease plants into lower light
Indoor light is much weaker than outdoor sun, even in a bright window. Sudden change can shock plants, causing leaf drop. Over the course of a week, gradually move them into shadier spots on your balcony—say, from a sunny corner to filtered light near the door. This acclimation period helps them adjust without protest. If a cold snap forces you to rush, at least place them in your brightest room and expect a few leaves to yellow as they adapt.
Find the best indoor real estate
South- or west-facing windows are usually prime territory, offering the most hours of sun. East-facing windows work for lower-light plants like pothos or ferns. Keep foliage from touching cold glass at night. If your windowsill is tight, use plant stands, shelves, or a slim console table to create vertical tiers. For truly light-starved spots, especially during short winter days, invest in a full-spectrum LED grow light. Position it 6–12 inches above the canopy and set a timer for 12–14 hours daily. You don’t need a dedicated setup—a simple clip-on lamp with a grow bulb can keep a small collection happy.
Water less, feed not at all
Indoor conditions slow growth dramatically, so plants use far less water. Let the top inch of soil dry out before reaching for the watering can. Overwatering in low light leads to root rot and fungus gnats; it’s the most common winter mistake. Similarly, hold off on fertilizer entirely. Pushing new growth when light is scarce produces weak, spindly stems. Resume feeding only when you see fresh shoots in spring, usually around March.
Moving tender plants indoors is a temporary transplant. With a little preparation and care, you’ll keep your favorite greenery alive through winter. Come spring, they’ll be ready to reclaim their spots on the balcony, invigorated by the return of warm sun and open air.
Adjust Watering and Care for Container Plants Staying Outside
When winter settles onto your balcony, the way you water and tend to container plants needs to shift. The goal is to avoid root damage from frozen soil while keeping plants hydrated enough to survive.
Water sparingly, but time it right—give plants a drink when temperatures are above freezing and a light freeze is expected soon. Moist soil holds heat better than dry soil, so watering a day or two before a cold snap can insulate roots. However, never water when the air or soil is already below 32°F (0°C), as this can create an ice layer that damages roots and pots.
By late fall, stop all fertilization. Encouraging new growth now is risky because tender shoots won't have time to harden off and will be the first to suffer in frost. Let plants rest; their metabolism slows, and they need far fewer nutrients.
Winter storms can knock over pots or dislodge protective covers. After strong winds or heavy rain, do a quick balcony check. Re-secure any frost blankets or cloches, and make sure pots are stable. A little vigilance keeps small problems from turning into frozen casualties.
FAQ
Can I leave my potted plants outside on the balcony in winter?
It depends on the plant's hardiness and your local climate. Tender annuals and tropicals typically need to be moved indoors, while cold-hardy perennials in large, well-insulated containers may survive if sheltered from wind. Always check the plant's cold tolerance and consider using frost cloth or grouping pots for extra protection.
What temperature is too cold for balcony plants?
Most tender plants suffer damage when temperatures drop below 45°F (7°C), while cold-hardy species can handle brief dips into the 20s°F (-6°C). Factors like wind chill and root exposure in small pots can lower the effective temperature, so use a thermometer on your balcony to monitor conditions closely.
How do I insulate a planter box?
Wrap the sides of the planter with bubble wrap, burlap, or an old blanket, securing it with twine. For extra protection, line the inside with foam board or straw before planting. Elevate the box on pot feet to prevent freezing to the balcony floor and promote drainage.
Should I water plants before a freeze?
Yes, watering thoroughly a day or two before a freeze helps insulate roots and prevent cold injury. Moist soil retains heat better than dry soil, but avoid waterlogged conditions which can rot roots. Aim for damp, well-drained soil to buffer roots against sudden temperature drops.
Can I use bubble wrap to protect plants from frost?
Absolutely, bubble wrap is an effective and inexpensive insulator for containers. Wrap the pot's exterior loosely, leaving the top open for air circulation, and secure it with tape or string. For plants themselves, create a tent with bubble wrap supported by stakes, ensuring it doesn't touch the foliage to prevent condensation damage.
When is it safe to put plants back outside in spring?
Wait until after the last expected frost date for your USDA hardiness zone, typically once nighttime temperatures consistently stay above 50°F (10°C). Gradually acclimate plants by setting them out for a few hours daily over a week to avoid shock. Keep an eye on weather forecasts for unexpected late cold snaps.